Tuesday 25 February 2014

POST SCRIPT

COVER

Having said I thought a cover would be a good idea, I thought I had better get on with it. I made this from greyboard, holding the cut sections together with masking tape and lining the inside before folding it together. I then applied pieces of paper to the outside and gessoed it. The collage is made up of elements from the course, especially cut outs of our weathervane in greens and pinks. I then stamped it with some of the many bird stamps I had made in the last few months and printed the farm name down the spine.


Well that really is the final part done.

Friday 17 January 2014

Final Assessment piece - Free standing book

6.10.1

I started my final piece last year.  I had thought I knew just what I wanted, but after a really big struggle through the first two pages of a book that would have been about A4 format, I realised I was not at all happy with it, the way I was doing it or the size, so it got ditched.

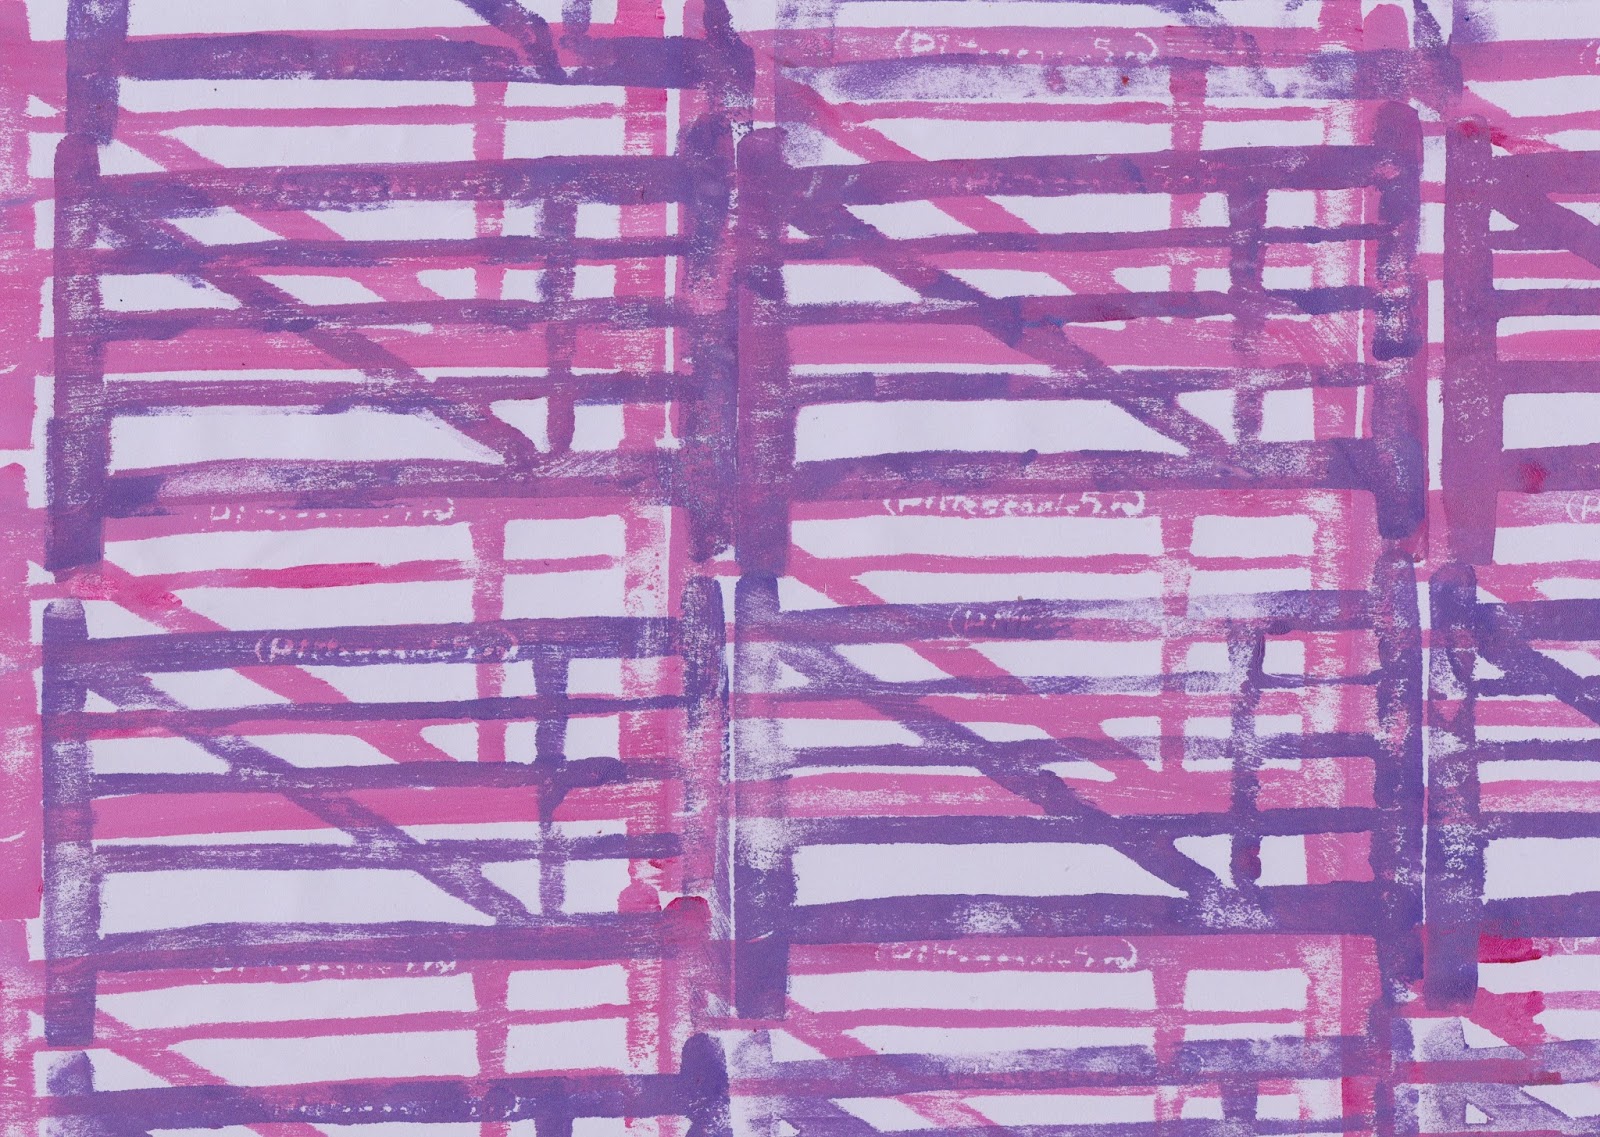
This book, called Pittescombe Farm is a little wider than A5.  The paper used was one large piece of wallpaper lining paper.  I like using this as you can cut it as long as you like and it is, after all,  made to take water.

The piece I cut was 40cm wide by 120cm long and I then folded it in half lengthways with the fold at the bottom. The applied covers are mount board with gesso.

The front cover shows a millstone, that is still here. it is made from fun foam, painted with gesso, textured and other medium applied.  The hand dyed strips of cotton have been glued on. The fastening is by means of the ribbon and a 'tie down' stuck to the edge.


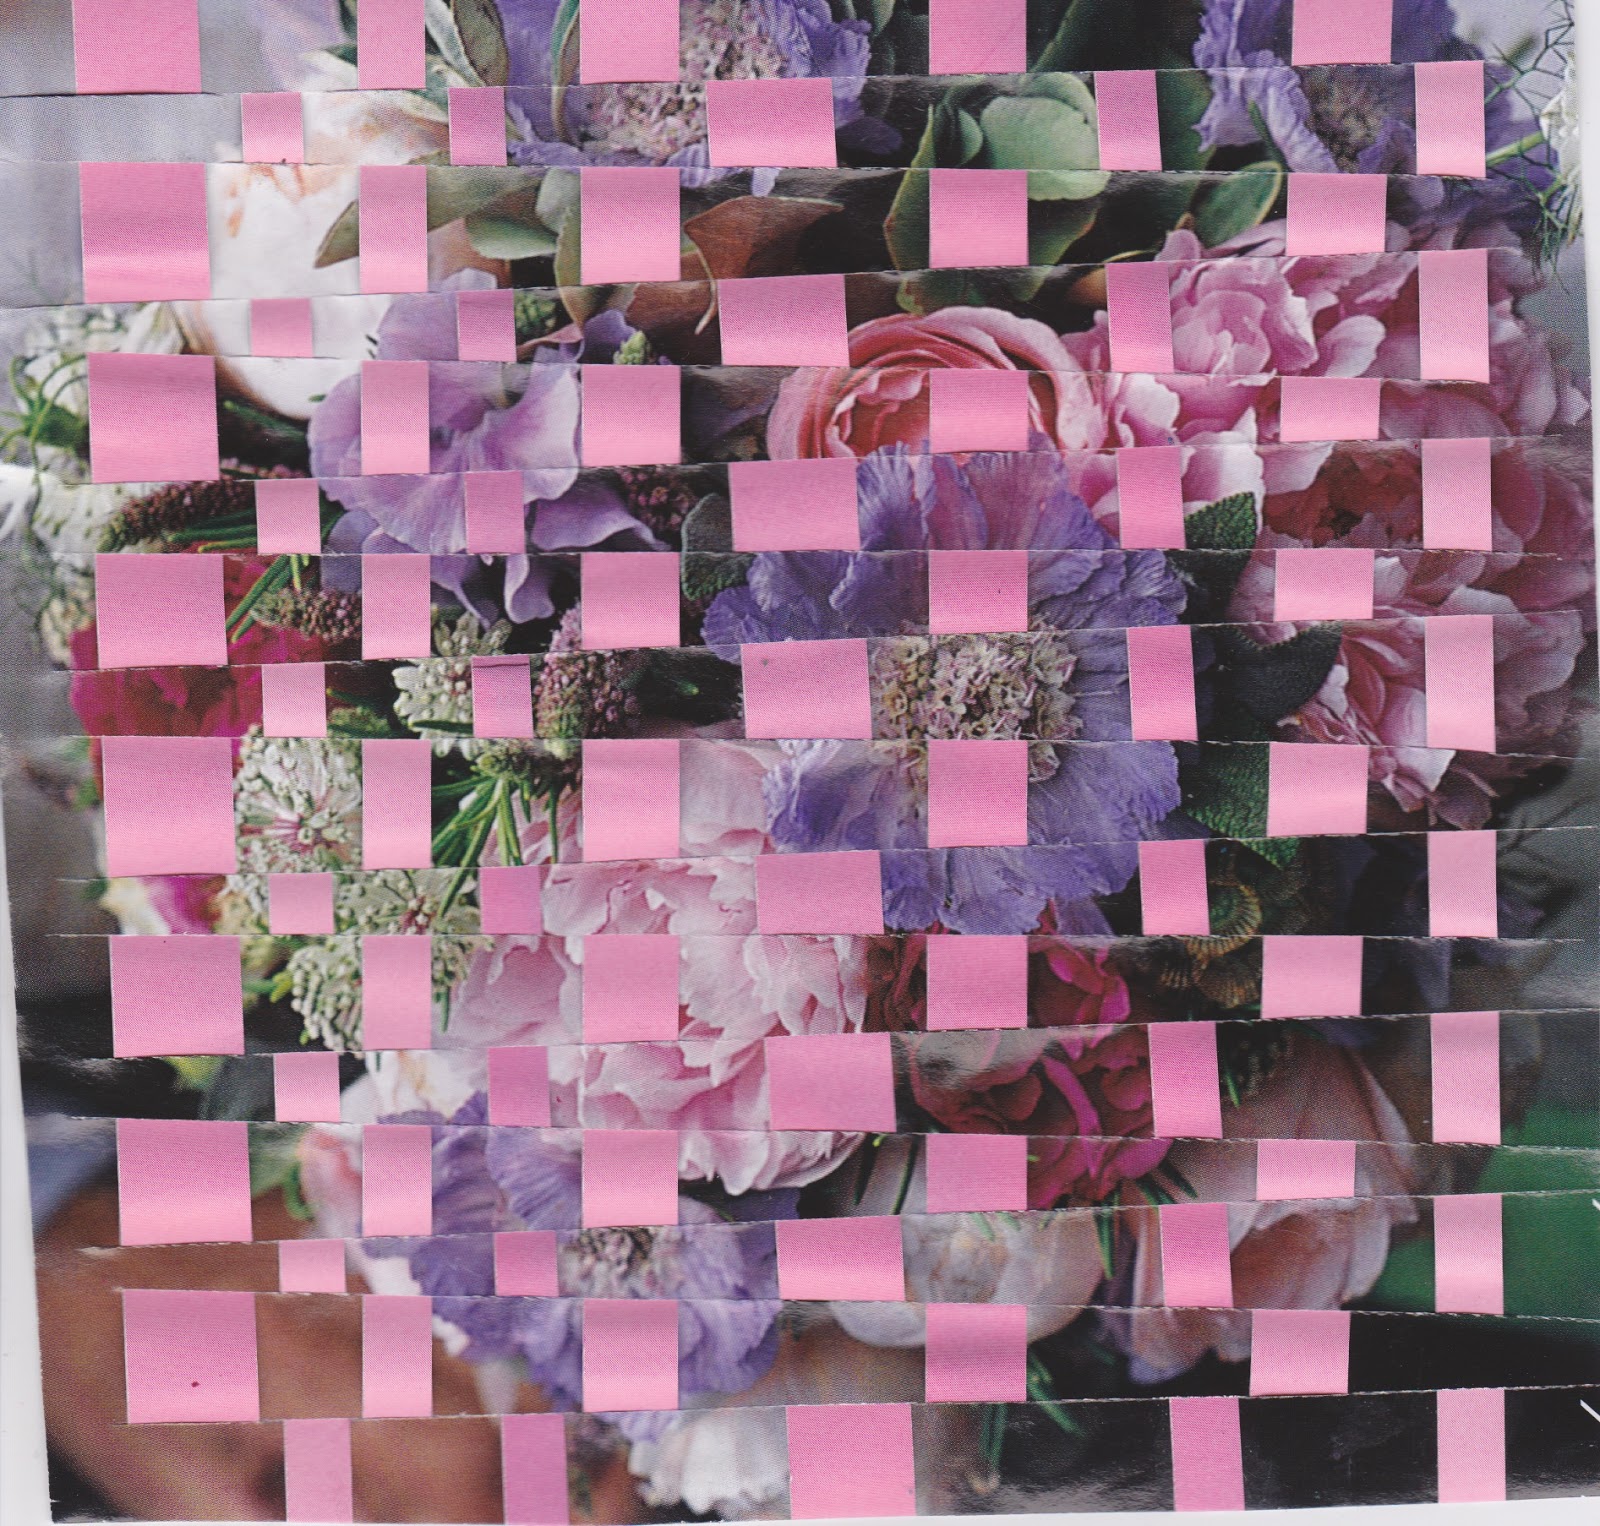
The back cover is one of my favourite sample pages. I thought of doing an image on top, but in the end left it as it is.  I may make a slip case for the book as I would like to keep it in good condition.


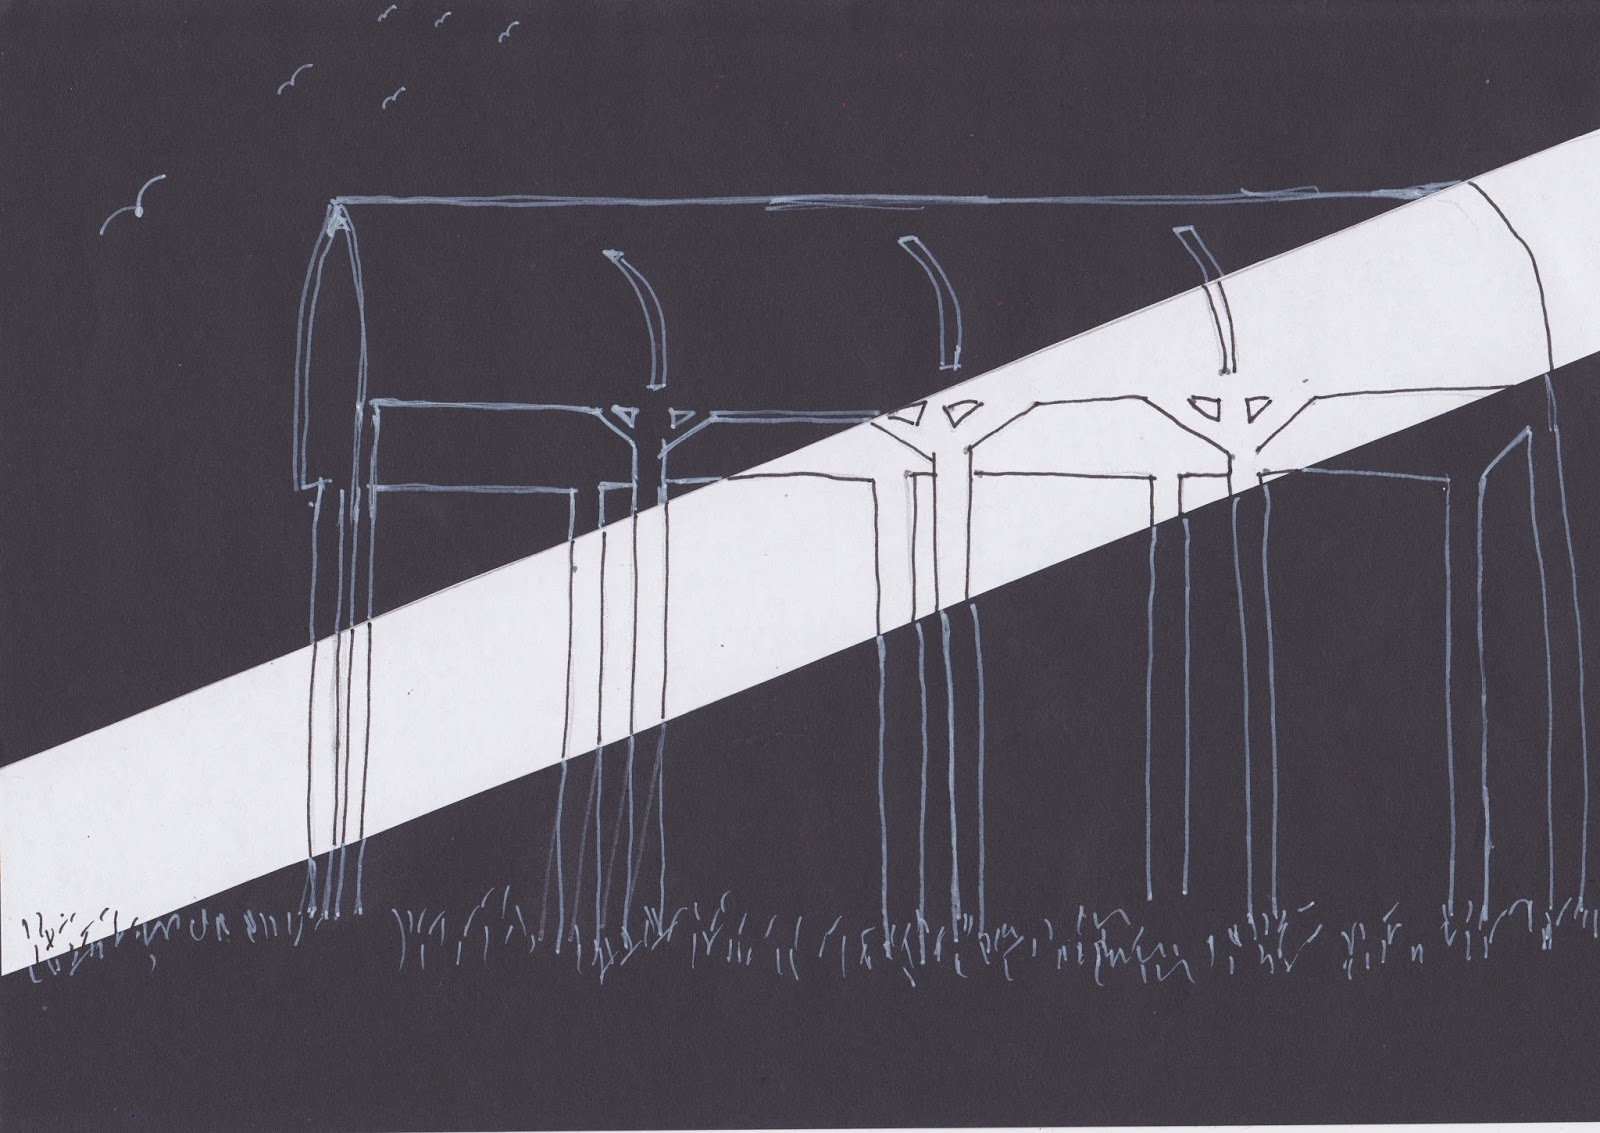
This is an overview of the first side.


The farmhouse  It took a while to work out that I had to cut a slit in the bottom of the page to get the middle section to pop forward, but I got there in the end. The right hand border is supposed to reflect the weathervane shown top left.  The gates at the bottom are individually cut and applied. as are the cows.


Bat Hotel  I think perhaps this page is a bit busy. I wanted to show all the birds we have, then after our bat survey, all six types of bats we have here. We will probably make one of the barns into a bat hotel. The anvil is on a pop up, but doesn't really show as such. I had to include the baby bat we rescued from our living room and my favourite pheasant.


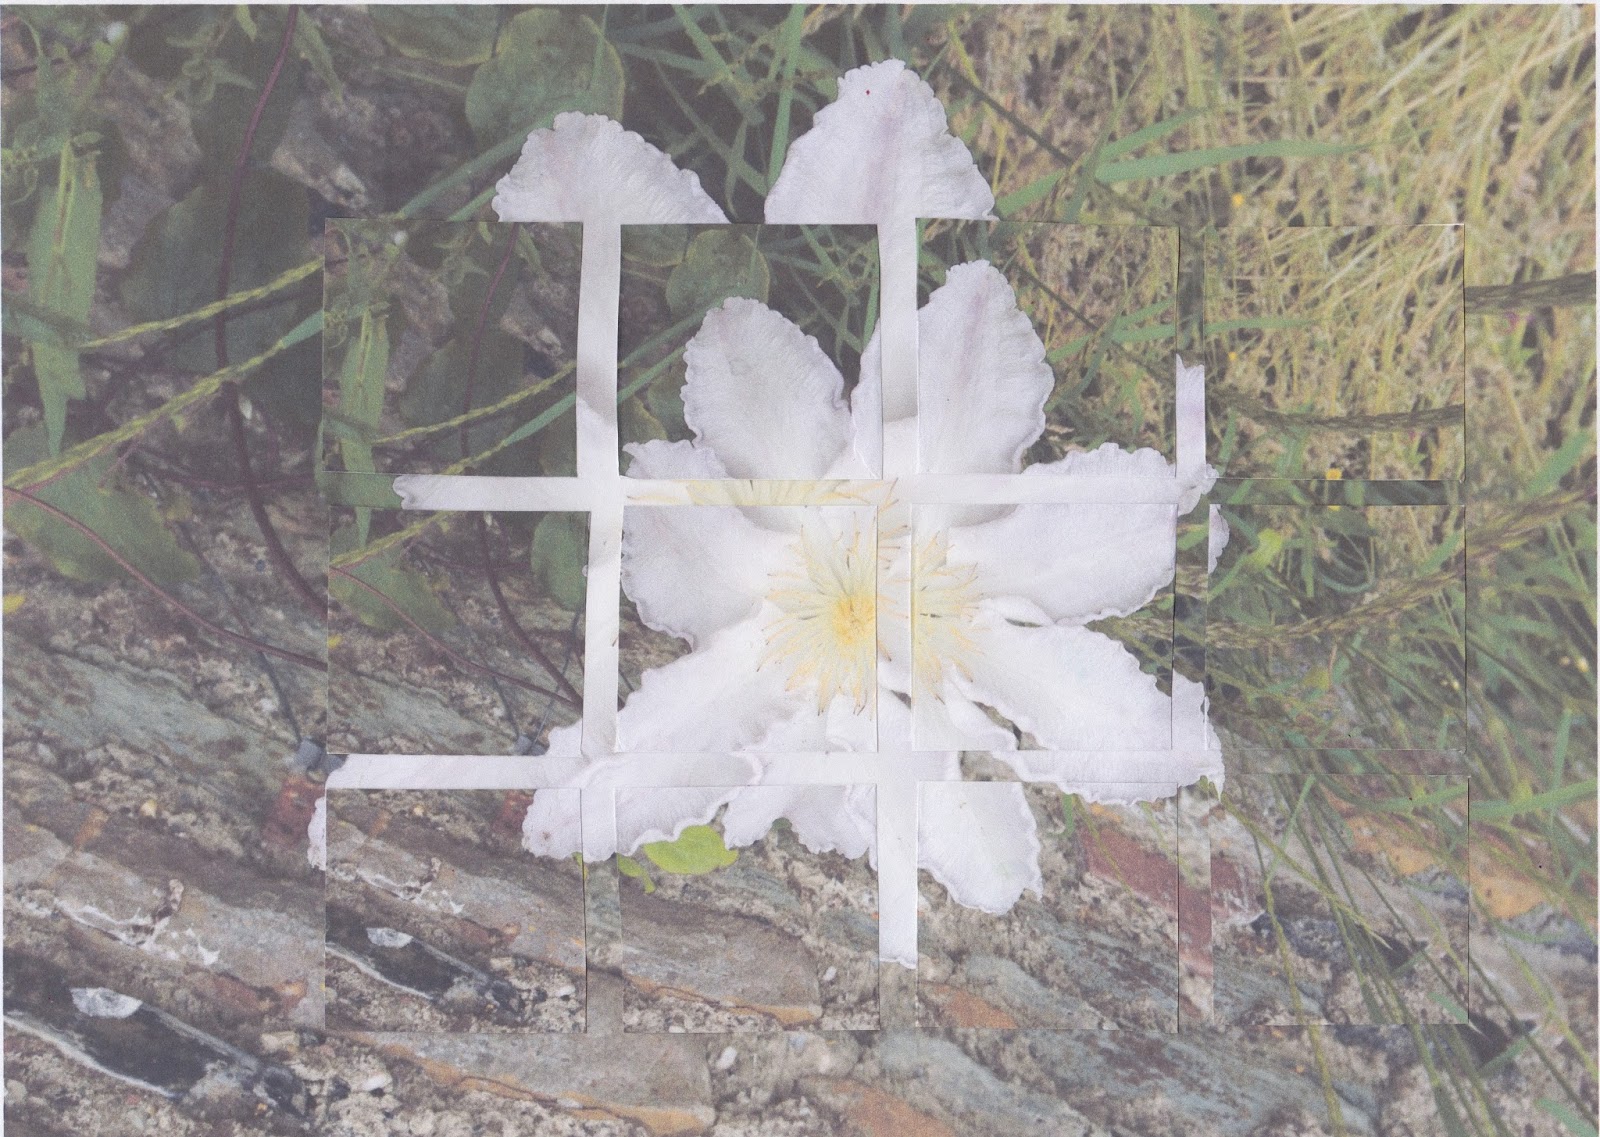
Foxgloves and frogs   Perhaps my favourite page. We had an abundance of foxgloves last summer, and thousands of frogs the year before. The largest foxglove in the picture is mounted on acetate and pops up. the others were individually cut and stuck on, as were the frogs. Hand stitched band along the bottom.


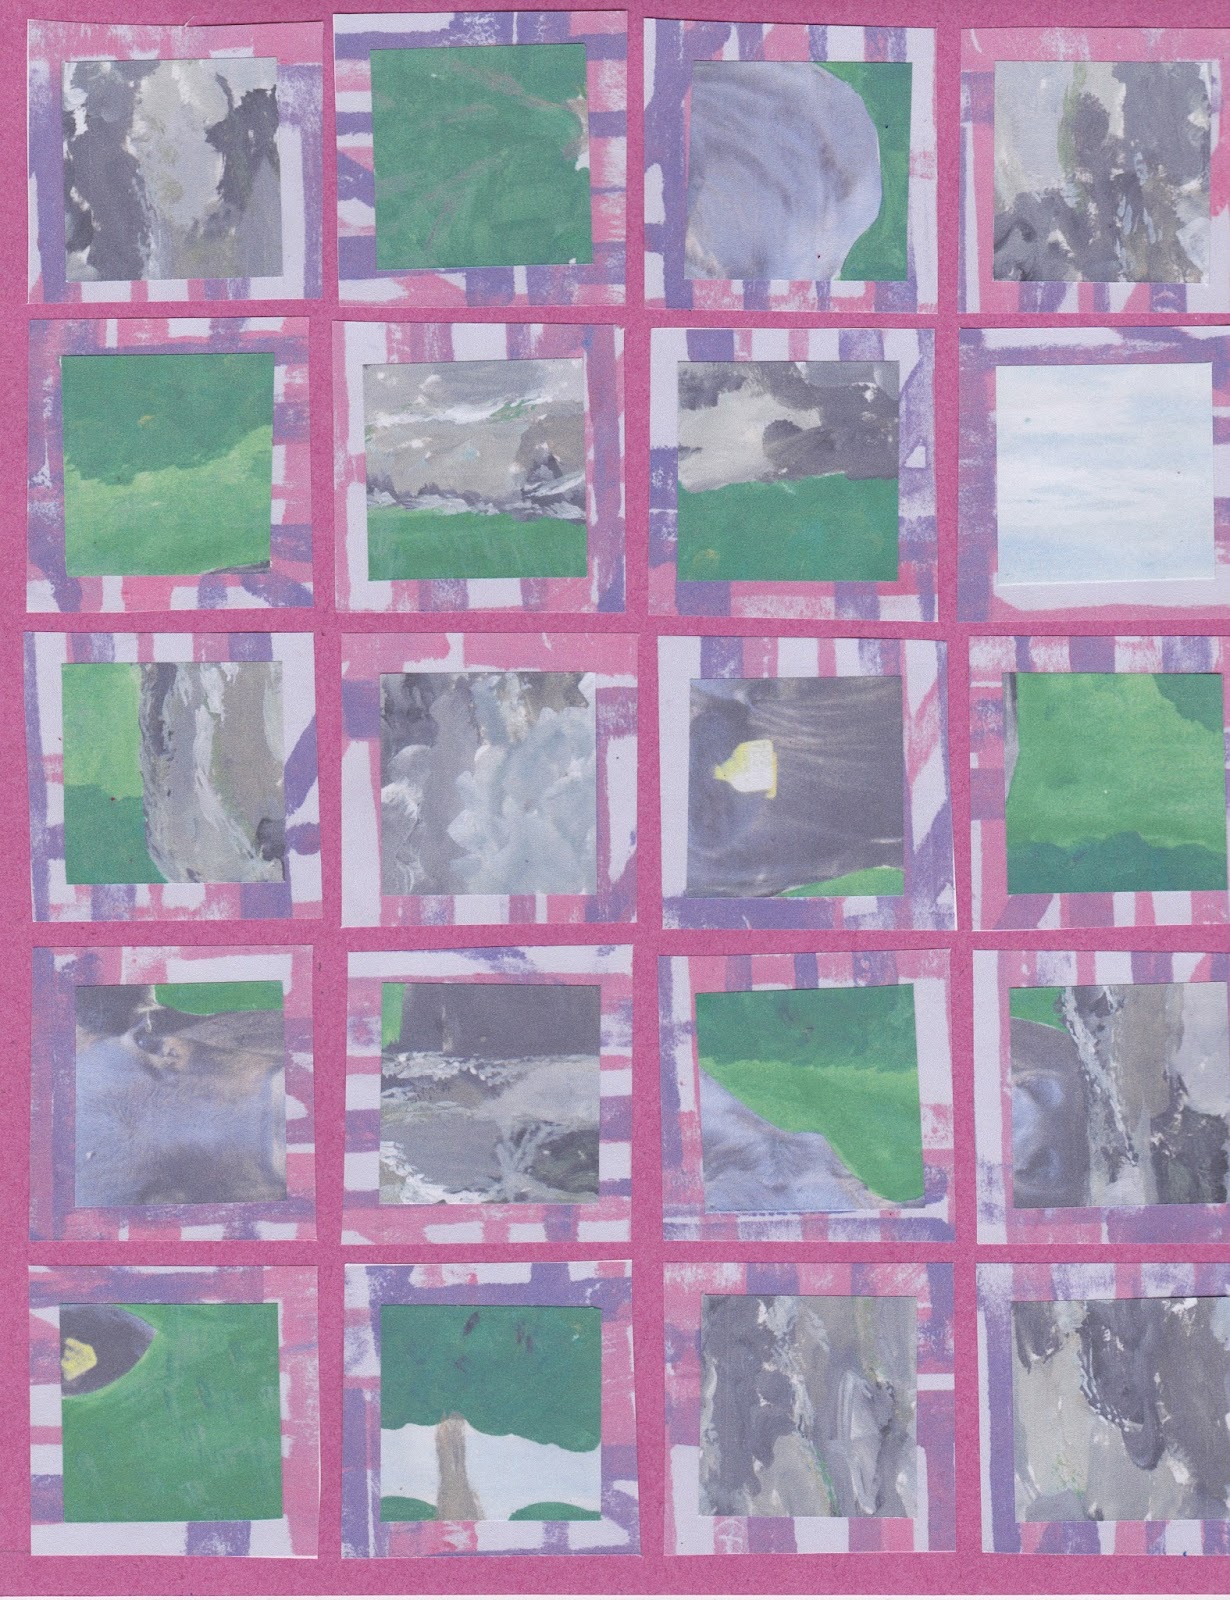
Sheep and stream  I chose some of my photos of the stream - The Lumburn - that runs through the farm and embedded them plus one of the pond onto the page with plenty of gesso. I learned from a past lesson that it works better with more.  The lamb is again a pop up. There are so many different types of sheep, some of them written up the sides of the page. Again hand stitching, this time of course, in wool.


An overview of the reverse side


Starlings I wanted to combine collage with stamping and painting, but the small format means that is can't be too elaborate. The birds are done with yet another stamp made from foam and the two large ones in the foreground are cut out of black paper.


Bird watching The window, cat etc are made as a smaller double page than the background, so when it is opened, it gives a 3D effect.  It was a pickle to photograph it in an open enough position. Some of the birds are torn paper, one stitched.


Swallows and eggs I love having the swallows here in the summer and last year found several egg shells under the nests.  Yet another foam stamp, plus collaged eggs and bird drawn and painted, then stuck on.

This book has been a joy to do and it was lovely to spend time on a subject 'close to my heart'. The time taken was approximately 75 hours, plus hundreds of 'thinking' hours spent on getting all the things I wanted onto the pages and how to solve problems with pop ups and making it a double layer.  I left the cutting of the top until the end in case anything got cut by mistake.

There were not really any safety issue, apart from using scissors and a craft knife. I always use my cutting mat and have one small enough to slide in between the pages. The cover always goes back on when I have finished. The glues were PVA and a very handy Zig memo stick, both very 'friendly'.

The paints were mostly Inktense, some crayon, gouache and inks. No health issues there.

What an enjoyable three years, thank you so much Viv for being an excellent tutor.

Thursday 12 September 2013

Module 6 - Chapter 9

Decorated edges and borders

6.9.1

This is a lovely chapter and one I could have spent days on, if I had the time.

1) Trees. Simply torn edge with tree printing. A little extra colour at edges
2) Flower buds. Partial punch, cut into
3) Oak leaves. Bought punch
4) Random holes. Various sizes punched with my Japanese hole punch. I love it (the punch)
5 Oak leaves. As before but glued to edge

6) Weather vane. A partial hole punch for snowflakes.
7) Cogs. Not very cog like
8) Stitches. Machine made holes then hand stitched
9 Houses. Hand cut roves and hole punched squares
10) Wooly. Hand made slits with hand dyed pure wool threaded through.


I could imagine making an entire book just out of decorative edges, but I am looking forward to using some of these and others in my final book.

Module 6 - Chapter 8

Fun with photographs and Photocopies

I have certainly learned to do a lot more with my computer on this course.  During this module I came across some quite clever things such as speech bubbles, writing on photos etc.  However next time I thought about using them I couldn't find them.  Perhaps I should go on a Mac course one of these days.  However I have been using Picassa for years and it is very straightforward apart from the fact that right now I can't get a changed photo from where I have it to here!

Using photographs
This picture turned out far too simplistic.  The original pic shows the cow in a field looking over a gate with lots of others.  When I put him by himself I should have made the painting more interesting.  I would  not use it like this. Also he is not as well 'embedded' as he should be.


Cutting into strips or squares.
When I then cut the above picture up to rearrange it, of course it didn't look at all interesting, so I combined it with one of the gate pictures.

This is the same combination as above, but woven.


I tried a variation on the waterlilies picture, but oh it certainly does depend on the picture one is using. This was most disappointing.


Then I tried a different ratio with another picture, but still not good.


I have one of Sandra Meech's books, bought whilst on a course with her, so I have a ready reference to her work which is very useful.

In the last chapter I used the writing on one of my sheep pictures. Here it is again since I quite like it.


I used a black and white photocopy of one of my cog pictures cut up and rearranged.  I think this could have potential.


I used a black and white copy of the cogs and then painted over it with blue and pink Then glued torn strips of tissue with writing over the top.   It all looked rather dark and strange.  I then had the odd idea to print on it in white, using a foam block of a tree and my sheep, plus bubble wrap.  Looks quite out of place in this chapter.


Take a fragment and draw to complete. I used one of my barn pictures that was on a transparent sheet to photocopy. The pen I used to draw on the black was tricky. It is a Zig Writer in chalk pastel white, but the odd thing was it is clear when you are using it and not white until it dries.  Makes things a little different. I should have switched to a white crayon.


The collage of photos included one I don't think I have shown before. It is a tiny baby pipestrelle bat. We found him in the sitting room and he was not even as big as the top joint of my thumb. When it started to get dark we put him outside and he crawled out of his box.  When my back was turned he disappeared. Apparently at that age/size if they call to their mother she can come and pick him up by the scruff of his neck and take him away.  Ahhhh.


This chapter was very informative and certainly covered an awful lot of techniques, many of which I need to give more time and attention and hope to do so soon.  I feel there is room for lots of improvement here.

Friday 6 September 2013

Module 6 - Chapter 7

MIXED MEDIA LAYERS

6.7.1

I started with the first idea by tearing pieces of magazine pages and sticking to a base layer, then doing a green wash, followed by drawing around shapes and then stamping with a home made stamp.

a)

b) Then cut and stuck some of my foxglove oil pastel drawings that I had photocopied in various sizes


c) These beautiful colours in a magazine, when woven together, also reminded me of my colour scheme.


d) But I didn't think much of this result. Torn shapes placed to give an impression of foxgloves


e) Perhaps a similar idea using my weathervane background would work, no not really


f) A change of subject. I used one of my lamb pictures that had not come out very well last time, made a larger lamb mask and stuck it in place.  Then I used an overbright wash of Inktense. Yes of course it is intense!  When I removed the mask I was disappointed with the result, so made another cut out, this time of tracing paper, stuck it on and darkened it slightly with a pewter oil pastel.


g) More cut outs, some overprinting of sheep breeds (there are hundreds of them) and a little sewing. I like this one.


h) Last year I made this hare, copied from a mug, into a foam stamp and have used him quite a bit since then.  I traced around a cut out onto a 'farm gate' page from the last chapter with progressively lighter/thinner pens and filled in a little with paint applied lightly with the end of a brush.  I could, I know do lots more with this lovely chap.


i) Sometimes when I start experimenting I get halfway through and wonder what the heck I am doing. This is one of those time.  The background is Markle over a extured background. The weird tree is hot melt glue, which obviously comes out lumpy, ironed to flatten it. Then I used foil over the top ironing it lightly to remelt the glue a little. Additional pale green paint then added on top.  I shall not bother with that idea again. The hare is cut out of tomato puree tube and textured by being pressed onto a cheese grater.  All a bit strange.


I have mixed feelings about this chapter. It is a very enjoyable one to do but I am feeling that I need to get on as time is running out.

Monday 5 August 2013

Update on September 2012

Last autumn when things were getting very hairy here, I finished my Owl & Pussy Cat book in a bit of a hurry and I didn't like the cover very much at all.  I have just got around to amending it. I used raw cocoon strippings, sprayed with dye and ironed with a hot dry iron. I cut out the heart shape to show the original pair, stitched some waves and stars and then glued it in place.  I think it is an improvement, although they do look a bit washed out in the middle there.


Saturday 3 August 2013

Module 6 - chapter 6

Printmaking with foam sheets

My printing surface is very quick to set up.  I have a portable padded ironing board (with cutting mat on the reverse) that I use by slipping a plastic carrier bag over, that is an excellent fit and wipes clean.

6.6.1

To make some fairly basic printing blocks, I used the farm gate with the name Pittescombe on it, although I didn't really expect this to be readable, a lamb from one of my drawings and the words "farm" and "lamb". These were made from foam which I know I don't have an allergy to as I have been using it for many years, and also another block of a lamb using a piece of pizza tray.


a) this is done on plain black paper, first with white then blue. I think the black background is very effective.


b) This pale lilac patterned background doesn't really show up

c) The background to this is painted mauve and lime green, done ages ago for this course


d) This is one of my favourites in this chapter. Again a background that I have had for ages, the gate block is done in copper and the word 'lamb' oddly enough in a pearlised green textile paint. It was a new one and I wondered how it would look on paper.


e) The first of the blocks done combining the two methods.  Not very interesting at all. Again it needs more going on in the background.


f) Getting a bit better, but the sponge too damp when applying the paint to the polystyrene.


g) I like this a lot more.  I think this would be very effective sliced up and rearranged, but I won't do that just yet.

Come to think of it, some of the above that I don't like would benefit from slicing/dicing and a bit of extra colour.  I did a few more, like one of lambs on a magazine page of wooly jumpers and other experiments, but they are not worth putting on here.

I have remembered my magpie block that I made for this course as well, he may get used later. I do like doing printing very much, so this was fun if not as successful as I had hoped.